

How to Install Checkerboard Tile: Layout, Planning & Waste Guide

Checkerboard tile is one of the few patterns that has never truly gone out of style, and right now it is having a genuine revival. The alternating two-color grid is showing up in modern kitchens in large-format porcelain, in bathrooms with warm neutral pairings, and in entryways with marble look finishes. The appeal is clear: strong visual impact without complex tile shapes or expensive materials.
But a clean checkerboard floor does not happen by accident. Because the pattern depends on alternating colors, perfectly straight grout joints, and balanced cuts at every edge, small layout mistakes become very visible once the floor is complete. The stronger the color contrast, the more important the planning.
This guide walks through every decision that affects the final result, from layout direction and tile size to starting point, grout selection, and how much extra tile to order.
Quick Answer: How Do You Plan Checkerboard Tile Before Installation?
Measure the room, choose a straight or diagonal layout, select your tile size and material, dry lay the pattern, identify the best starting point, confirm grout spacing, and order 10 to 20 percent extra for waste and cuts. Straight layouts are cleaner and easier to install. Diagonal layouts add movement but require more cuts and more planning.
Is Checkerboard Tile Still in Style?
Yes. Checkerboard tile has been a design staple for centuries, from Victorian hallways to mid-century diners to contemporary interiors, and it is currently gaining mainstream momentum again. Modern versions have expanded well beyond classic black and white: warm neutral pairings like biscotto and cotto, textured 3D surfaces, star-and-cross variations, and large-format porcelain in 12x12 and 24x24 have all broadened what checkerboard can look like.
Unlike purely trend-driven patterns, a well-executed checkerboard floor reads as architectural and intentional. The key is matching the tile size, color pairing, and layout direction to your specific space.
Why Checkerboard Tile Requires Extra Planning
Unlike single-color tile, checkerboard flooring creates a repeating geometric pattern that naturally draws the eye across the entire floor. That means any inconsistency, whether a small sliver cut near the doorway, a slightly off-center starting point, or uneven grout joints, becomes obvious rather than hidden.
Before setting any tile, plan for:
- Layout direction (straight or diagonal)
- Tile size and material
- Room measurements and waste allowance
- Starting point and primary sightline
- Grout color and joint spacing
- Edge cuts near walls, doorways, vanities, and cabinets
This preparation stage has a bigger impact on the finished floor than almost any other factor.

Step 1: Choose Your Layout Direction
The first major decision is whether the checkerboard pattern runs straight with the walls or diagonally across the room. Both are correct; they just produce different results.
Straight Checkerboard Layout
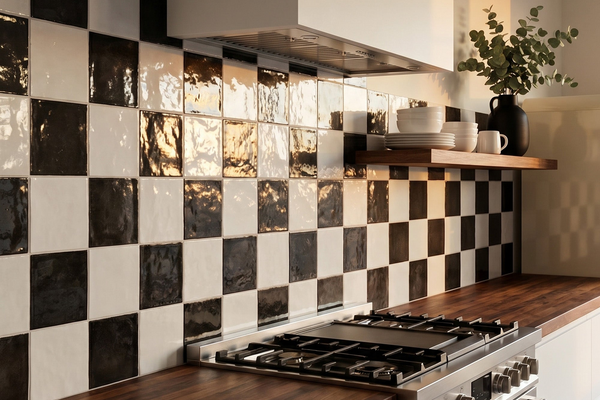
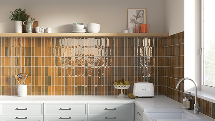
A straight layout keeps tiles parallel to the walls. It is cleaner, installs faster, and produces less waste. Most straight checkerboard floors suit kitchens, laundry rooms, mudrooms, entryways, and open-plan spaces. Large-format tiles from the Amuri Checkerboard Tiles collection work especially well in straight layouts, where the larger grid feels calm and architectural rather than busy.
- Fewer perimeter cuts
- Less tile waste
- Faster installation
- Works well in larger rectangular rooms
- Clean, modern feel with large-format tile
Diagonal Checkerboard Layout
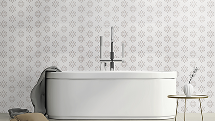
A diagonal layout rotates the pattern 45 degrees, creating more visual movement and making compact spaces feel larger. It is popular in entryways, bathrooms, powder rooms, narrow hallways, and small foyers.

Because every perimeter edge must be cut at an angle, diagonal layouts produce more waste and take more planning. Order more material, dry lay the full pattern before installation, and confirm that the room is wide enough to display at least two full tiles point-to-point before committing to the diagonal direction.
Step 2: Choose Your Tile Size
Tile size affects both the visual feel and the complexity of installation. Smaller checkerboard tile tends to feel more classic and detailed. Larger tile creates a cleaner, more contemporary appearance with fewer grout lines.
Small-Format Checkerboard Tile (4x4 to 9x9)
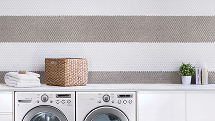
Small-format options add movement and pattern without needing a large room. They work especially well in powder rooms, small bathrooms, laundry rooms, backsplashes, and compact entryways.

Browse Stage Checkerboard Tiles for 4x4 matte porcelain bundles in multiple color combinations, and Fuego Checkerboard Tiles for 9x9 anti-slip matte porcelain suited to patios and wet areas.
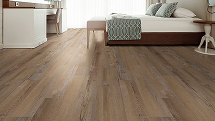
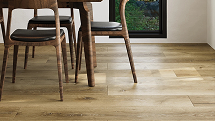
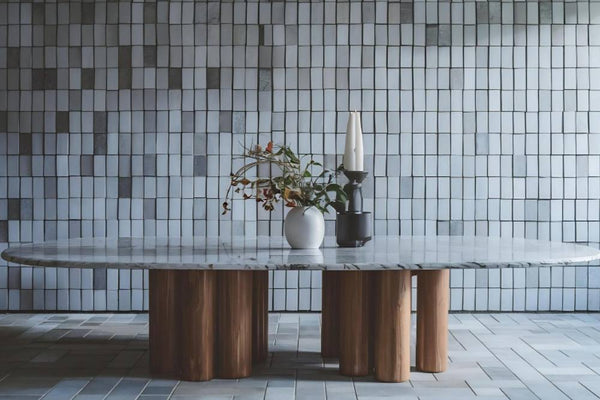
Large-Format Checkerboard Tile (12x12 to 24x24)
Large-format checkerboard tile creates fewer grout lines and a more open, architectural rhythm. It works particularly well in kitchens, foyers, open floor plans, living areas, and larger bathrooms.

Browse Amuri Checkerboard Tiles for 8x8 and 24x24 warm neutral pairings, and Palazzo Checkerboard Tiles for marble look porcelain in 12x12 and 24x24 formats.
Step 3: Choose Your Material and Finish
Material choice affects durability, maintenance, and visual style. Most checkerboard tile falls into two main categories: matte porcelain and marble look porcelain.
Matte Porcelain Checkerboard Tile
Matte porcelain is the most practical choice for everyday spaces. It hides water spots and footprints better than polished surfaces and provides better slip resistance, which is an important consideration for kitchens, bathrooms, mudrooms, and laundry rooms. For outdoor patios and wet areas that require added grip, Fuego Checkerboard Tiles include R11-rated anti-slip options.

Marble Look Porcelain Checkerboard Tile
Marble look porcelain gives you a classic stone-inspired appearance, with veining, depth, and polish, without the maintenance demands of natural stone. This style works well in formal entryways, primary bathrooms, traditional interiors, and European-inspired spaces. Compare options in the Palazzo Checkerboard Tiles collection, available in polished and natural finishes.

Step 4: Measure the Room and Calculate Waste
Accurate measurements prevent shortages and layout surprises. Measure the length and width of the room, then multiply to get square footage.
| Room Size | Square Footage |
|---|---|
| 10 ft x 12 ft | 120 sq ft |
| 8 ft x 10 ft | 80 sq ft |
| 6 ft x 8 ft | 48 sq ft |
Because checkerboard tile uses two colors, the total quantity is split between both components. Always order based on the full room square footage plus a waste buffer, not just half of it.
How Much Extra Checkerboard Tile Should You Order?
| Installation Type | Recommended Waste Buffer |
|---|---|
| Straight layout | 10% to 15% |
| Diagonal layout | 15% to 20% |
| Small rooms with many cuts | 15% to 20% |
| Outdoor patios | 15% to 20% |
A 100-square-foot room with a diagonal layout may need 115 to 120 square feet of tile in total. Always confirm final quantities with your installer before ordering, and try to order everything from the same production lot to avoid shade variation.
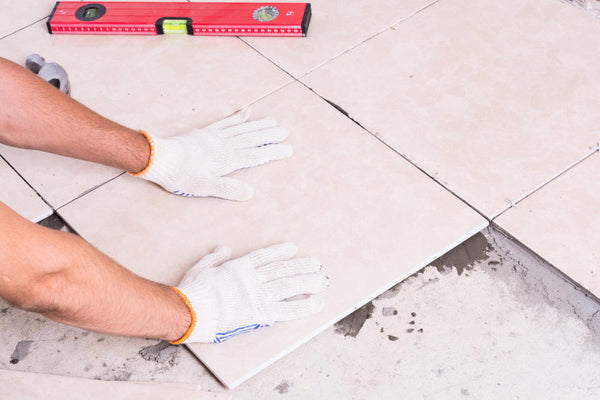
Step 5: Dry Lay the Pattern Before Installation
Dry laying means placing tile on the floor without mortar before installation begins. This step is especially critical for checkerboard tile because it lets you verify the entire pattern before anything is permanent.
Dry laying helps you:
- Confirm the alternating color sequence stays correct across the room.
- Visualize how edge cuts will land near walls, doorways, and cabinets.
- Test grout spacing before committing to it.
- Check overall room balance from the main sightline.
- Catch any tile-size variation between pieces before installation.
Lay out several rows in both directions, then step back and review the pattern from the doorway or the primary viewing angle. If a cut looks too small or visually distracting, adjust the starting point before you begin.
Step 6: Find the Best Starting Point
Not every checkerboard floor should start in the exact center of the room. The best starting point depends on the primary line of sight, meaning where people actually look when they enter the space.
- In an entryway, center the pattern from the front door or main opening.
- In a kitchen, align the layout with the main walkway or island.
- In a bathroom, prioritize the visible floor area rather than the space under the vanity.
- In a hallway, keep the pattern balanced down the center line.
Balanced cuts matter more than perfect mathematical symmetry. The goal is a layout that looks intentional from the places people actually view it.
Tip: Use the 3-4-5 rule to confirm your starting lines are truly square before installation. Measure 3 feet along one chalk line, 4 feet along the perpendicular line, and check that the diagonal between those two points measures exactly 5 feet. A true right angle here prevents pattern drift across the full room.
Step 7: Choose the Right Grout Color
Grout has a bigger effect on the final appearance than most people expect. The choice essentially comes down to two approaches: contrasting grout that sharpens the pattern, or blending grout that softens it.
Contrasting Grout
White or near-white grout against a high-contrast black and white checkerboard tile creates the sharpest, most graphic look. This works well in spaces where you want the pattern to read boldly, such as classic diners, retro-style kitchens, and vintage bathrooms. The trade-off is that contrasting grout requires more maintenance and shows staining more readily in high-traffic areas.
Blending Grout
Many designers prefer a grout color that lands between the two tile shades, softening the edge of each square rather than outlining it. This approach creates a more refined, contemporary appearance and is especially effective with warm neutral checkerboard pairings.
- Warm beige grout pairs well with taupe, cream, avorio, and biscotto tile.
- Soft grey grout works with charcoal, grigio, and white combinations.
- Mid-tone neutral grout can reduce the visual intensity of high-contrast floors.
Always review grout samples next to the actual tile in your lighting conditions before committing. Grout color shifts significantly between wet and dry, and between indoor and outdoor light.
Grout Spacing
Consistent joint spacing is non-negotiable with checkerboard tile. Uneven grout lines disrupt the repeating pattern immediately and are very difficult to correct after the tile is set. Use quality tile spacers, check alignment frequently as you work, and keep joints as narrow and even as possible for the cleanest result.

Common Checkerboard Tile Installation Mistakes
The most common mistake is underestimating how visible layout inconsistencies become once the pattern spreads across the floor. High-contrast checkerboard is especially unforgiving, and any misalignment shows immediately.
Other frequent mistakes include:
- Skipping the dry layout stage and discovering edge cut problems after mortar is mixed.
- Ordering too little tile. Since checkerboard relies on matching colors and batch lots, running short mid-installation can delay the project significantly.
- Choosing grout with too much or too little contrast without testing samples first.
- Failing to check alignment regularly during installation, allowing small drift to compound across the floor.
- Using indoor tile in outdoor or wet-area applications that require slip resistance or frost rating.
- Selecting a tile size that feels too busy or too sparse for the specific room dimensions.
- Forgetting to account for cuts around doorways, vanities, cabinets, or stairs during the planning stage.
Checkerboard Tile by Room
| Room | Recommended Style | Collection to Explore |
|---|---|---|
| Kitchen | Large-format matte porcelain checkerboard tile | Amuri Checkerboard Tiles |
| Bathroom | Porcelain or marble look porcelain sized to the space | Stage Checkerboard Tiles |
| Laundry room | Small-format matte porcelain checkerboard tile | Stage Checkerboard Tiles |
| Mudroom | Darker matte porcelain checkerboard tile | Stage Grey and Charcoal Checkerboard Tile |
| Entryway | Large-format porcelain or marble look porcelain | Palazzo Checkerboard Tiles |
| Patio | Matte anti-slip R11 porcelain checkerboard tile | Fuego Checkerboard Tiles |
| Backsplash | Small-format glossy ceramic checkerboard tile | Village Checkerboard Tiles |
Shop Checkerboard Tile by Collection
- Checkerboard Tile Collection: all checkerboard floor and wall tile options in one place.
- Stage Checkerboard Tiles: 4x4 matte porcelain checkerboard bundles in multiple color combinations.
- Amuri Checkerboard Tiles: 8x8 and 24x24 matte porcelain in warm neutral pairings.
- Fuego Checkerboard Tiles: 9x9 R11 matte anti-slip porcelain for patios, wet areas, and outdoor checkerboard floors.
- Kasbah Checkerboard Tiles: decorative star and cross matte porcelain checkerboard designs.
- Amalfi Checkerboard Tiles: warm star and cross matte porcelain checkerboard pairings.
- Village Checkerboard Tiles: 5x5 glossy ceramic checkerboard tile for walls, backsplashes, and decorative surfaces.
- Palazzo Checkerboard Tiles: marble look porcelain checkerboard tile in 12x12 and 24x24 formats.
FAQs About Checkerboard Tile Planning
Is checkerboard tile in style?
Yes. Checkerboard tile has never fully gone out of style, and it is currently seeing renewed popularity across kitchens, bathrooms, and entryways. Modern versions in large-format porcelain, warm neutral color pairings, and marble look finishes have expanded the aesthetic well beyond classic black and white.
Should checkerboard tile be laid straight or diagonal?
Both are valid choices. Straight checkerboard layouts are cleaner, easier to install, and produce less waste, making them a good fit for kitchens, laundry rooms, and larger rooms. Diagonal checkerboard layouts add movement and can make smaller spaces feel larger, but they require more cuts, more planning, and more material. Confirm the room is wide enough to show at least two full tiles point-to-point before choosing the diagonal direction.
What grout color should I use for checkerboard tile?
It depends on the look you want. Contrasting grout, such as white against black and white tile, makes the pattern bold and graphic. Blending grout, a mid-tone that sits between the two tile colors, softens the pattern and gives a more refined, contemporary result. Many designers prefer blending grout for warm neutral checkerboard pairings. Always test grout samples next to the actual tile before installation, as grout color changes significantly between wet and cured.
What is the 3-4-5 rule in tile installation?
The 3-4-5 rule is a quick way to confirm that your starting lines are perfectly square before installation begins. Measure 3 feet along one chalk line and 4 feet along the perpendicular line. The diagonal distance between those two endpoints should be exactly 5 feet. If it is not, your lines are not at a true 90-degree angle. Getting this right at the start prevents pattern drift that compounds across the full floor.
How much extra checkerboard tile should I order?
For straight layouts, plan for 10% to 15% extra. For diagonal layouts, small rooms with many cuts, or outdoor patios, 15% to 20% is safer. Confirm final quantities with your installer before ordering, and buy from the same production lot to avoid shade variation between orders.
Do I need to dry lay checkerboard tile first?
Yes, and it is especially important with checkerboard tile. Dry laying confirms the alternating color sequence, shows where edge cuts will land, lets you test grout spacing, and helps you adjust the starting point before anything is permanent. Skipping this step is one of the most common reasons checkerboard floors end up with awkward cuts near doorways or walls.
What size checkerboard tile looks most modern?
Larger formats, such as 12x12 and 24x24, create a cleaner, more contemporary appearance with fewer grout lines. Smaller formats like 4x4 are better suited to compact spaces, bathrooms, laundry rooms, and backsplashes where the tighter pattern adds character without overwhelming the space.
What checkerboard tile is best for patios and outdoor spaces?
Choose a tile rated for exterior use with a slip-resistance grade appropriate for outdoor conditions. Fuego Checkerboard Tiles include R11-rated 9x9 matte anti-slip porcelain options for outdoor checkerboard floors, available in warm pairings like Natural and Teja.


