












Education

An exposed tile edge can appear wherever tile stops before reaching another wall, cabinet, or built-in surface. Common examples include the end of a backsplash, the perimeter of a shower niche, the top of a tiled wainscot, and the outside edge of a pony wall. Leaving the unfinished body of the tile visible can make the installation look incomplete and may leave the edge more vulnerable to chipping.
There are five common ways to finish a tile edge: coordinating tile trim, a metal or PVC edge profile, a mitered corner, a tile return, or a flexible sealant joint. The right choice depends on the location, tile thickness, desired look, installer skill, and whether the tile has already been installed.
Quick answer: For most wall tile projects, coordinating bullnose or jolly trim is the simplest way to create a finished edge that looks intentional. A metal or PVC profile is a practical alternative when matching trim is unavailable. Mitered corners provide a seamless look but usually require an experienced installer. A tile return covers a recessed surface, while caulk or sealant should be reserved for appropriate transition joints rather than used to hide a fully exposed raw tile edge.
5 Ways to Finish an Exposed Tile Edge
| Method | Best For | Relative Cost | Installation Skill | Finished Look |
|---|---|---|---|---|
| Coordinating tile trim | Backsplash ends, shower edges, niches, wainscoting, and other visible wall edges | Low to moderate | Beginner to intermediate | Rounded bullnose or slim jolly edge that coordinates with the field tile |
| Metal or PVC edge profile | Modern designs or tile collections without matching trim | Low to moderate | Intermediate | Clean, narrow border in a selected color or metal finish |
| Mitered corner | High-visibility outside corners, niches, benches, and tiled shelves | Higher | Advanced | Tile-to-tile corner with little or no separate trim visible |
| Tile return | Window jambs, niche interiors, and recessed openings | Low to moderate | Intermediate | Field tile continues onto the adjoining recessed surface |
| Color-matched caulk or sealant | Perimeter and transition joints where tile meets another surface | Low | Beginner to intermediate | Flexible joint that coordinates with the grout |
1. Finish the Edge With Coordinating Tile Trim
A coordinating trim piece is made to complete the field tile installation. It is set with mortar like the surrounding tile and creates a deliberate transition instead of leaving the tile body exposed. The most useful options for a terminating wall edge are bullnose and jolly trim.
Bullnose Tile
Bullnose tile has one or more rounded, finished edges. It is commonly used along the exposed side of a backsplash, around a wall tile installation, or at the top of a tiled wainscot. Some collections include matching bullnose in the same color and finish as the field tile, while others can be paired with a coordinating or intentionally contrasting piece.
Before ordering, confirm that the trim is suitable for the intended application and that its size works with the tile layout. Availability, dimensions, surface finish, and edge treatment vary by collection.

Jolly or Edge Trim
Jolly trim is a narrow tile piece designed to create a slim finished border. Compared with traditional bullnose, it places less visual weight around the tile field, making it a useful choice for backsplashes, niches, shower walls, and other areas where a minimal tile-to-wall transition is preferred.
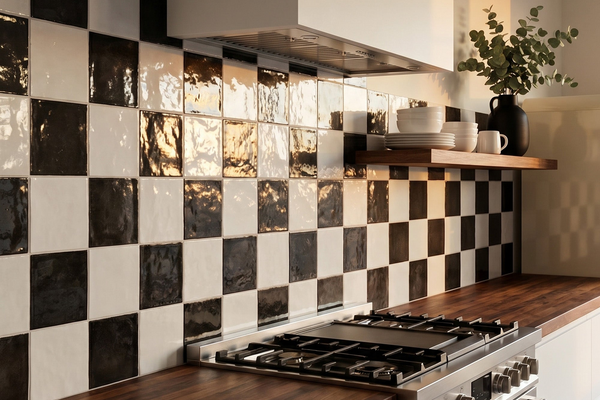
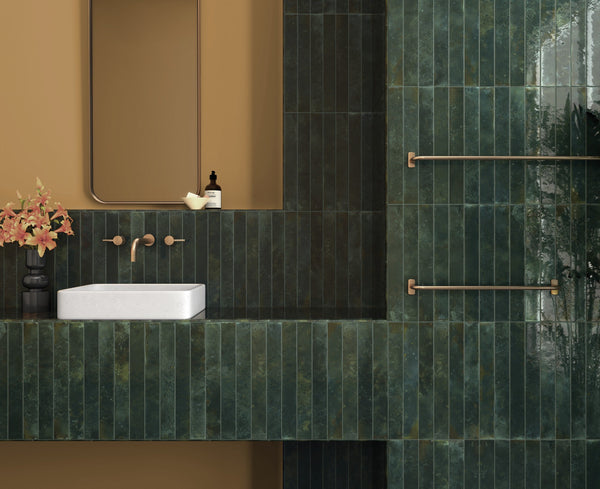
A jolly may be ceramic, porcelain, or natural stone. Choose a piece that coordinates with the field tile and is approved for the project location. The opening image shows a ceramic jolly used to frame coordinating tilework.
Pencil Liner
A pencil liner is a narrow strip of tile, usually under an inch wide and produced in set lengths of roughly 8 to 12 inches. Also sold as pencil molding or a tile border, its role is decorative first. It is commonly used to frame the perimeter of a backsplash, outline the inside of a shower niche or window opening, border a mosaic inset, or run as an accent band between two different field tiles. Certain profiles can also create a finished transition at a terminating edge when used as the manufacturer intends, but a pencil liner should not be treated as an automatic substitute for bullnose or jolly trim on every exposed edge.
Pencil liners are made in marble, ceramic, and porcelain, in glossy, polished, honed, and matte finishes. A liner in the field tile's color reads as a quiet finished line, while a contrasting strip frames the installation, so it is worth deciding which effect is wanted before ordering. In a shower or other wet area, a honed or matte surface is generally the more practical choice, and the tile and trim should both be confirmed as suitable for that application.
Wider strips in the same family, usually 2 to 3 inches, act as a chair rail and cap a half-tiled wainscot at the height a wood chair rail would sit. Patterned or textured strips, sometimes called listello, work best as a single accent rather than a repeating border. These pieces are typically sold by the piece rather than by the square foot, so measure the run being covered, divide by the length of one piece, and add extra for corners and cut waste.

Corner Trim and Cove Base
Not every product sold as tile trim performs the same job. Corner trim is shaped for a specific inside or outside corner. Cove base is used where a tiled wall meets the floor and creates a curved transition at the base of the wall.
These pieces should be selected by function, not simply because their color matches the field tile.

2. Use a Metal or PVC Tile Edge Profile
A metal or PVC edge profile covers and protects the exposed edge of the tile. Profiles are available in different shapes, colors, finishes, and depths, so they can either blend into the installation or create a contrasting outline.
The profile depth must work with the thickness of the tile and setting material. Many profiles have an anchoring leg that is embedded beneath the tile, which means they need to be selected before the final edge tiles are installed. Accurate layout and cuts are important because the profile creates a straight, highly visible line.
This option works especially well when a tile collection does not include coordinating bullnose or jolly trim, or when the design calls for a defined metal edge.
3. Create a Mitered Tile Corner
A mitered corner is made by cutting the adjoining tile edges at approximately 45 degrees so the finished faces meet at the outside corner. This allows the surface material to wrap the corner without a separate trim piece and is often used on shower niches, benches, pony walls, and tiled shelves.
Mitering requires precise cutting and careful handling. The installer must avoid weakening, chipping, or exposing a sharp edge, and some tile materials are less forgiving than others. For that reason, a mitered finish is generally best handled by an experienced tile installer, especially in a prominent or frequently touched area.
4. Continue the Tile With a Return
A tile return carries the field tile onto an adjoining recessed surface, such as the jamb of a window or the inside wall of a shower niche. It helps create continuity and can use the same tile as the surrounding wall.
A return is not always a complete edge-finishing method by itself. Where the front wall tile meets the returned tile, the leading outside edge may still need bullnose, jolly trim, an edge profile, or a mitered corner. Plan both the return and the visible corner before installation so the finished dimensions and grout joints align cleanly.
5. Use Color-Matched Caulk or Sealant at the Right Joint
A flexible caulk or sealant is used where tile meets another surface or where movement can occur, such as at certain perimeter joints and changes of plane. Color-matched products can coordinate with the grout and keep the transition visually consistent.
Caulk does not provide the same impact protection as bullnose, jolly trim, or an edge profile, and it should not be relied on to conceal a wide section of exposed tile body. In a wet area, use a sealant rated for that application and follow the tile, setting-material, and sealant manufacturers' instructions. A small transition joint and a finished tile edge may both be needed in the same location because they perform different jobs.

How to Choose the Right Tile Edge Finish
For a Backsplash That Ends on an Open Wall
Use coordinating bullnose or jolly trim for a tile-framed look, or choose a slim edge profile for a clean modern line. Where the installation meets painted drywall, the installer may also need a neat perimeter joint. Do not assume caulk alone will hide the unfinished body of a thick tile.
Explore backsplash tile and check the individual series for coordinating trim options before finalizing the layout.
For a Shower Niche or Window Opening
A tile return can cover the inside surfaces, but the outside perimeter still needs a planned corner treatment. Bullnose, jolly trim, a metal profile, or a professionally mitered corner can create the finished front edge. For a shower tile installation, verify that every selected tile and trim piece is suitable for the intended wet-area application.
For a Pony Wall, Bench, or Outside Corner
Consider a mitered corner for the most continuous tile look, a profile for visible edge protection, or a compatible corner trim piece. Because these edges are easy to bump or touch, durability and comfortable edge geometry matter as much as appearance.
For the Wall-to-Floor Transition
Cove base is designed for the base of a tiled wall. It should not be treated as a substitute for bullnose at the exposed side or top of a tile field. The adjoining joint must still be detailed according to the installation requirements.
What to Check Before Ordering Tile Trim
-
Trim availability: Confirm the field tile collection offers the needed bullnose, jolly, pencil liner, corner, or base piece. -
Application: Verify that the tile and trim are suitable for the wall, floor, shower, pool, outdoor, or commercial location where they will be installed. -
Thickness and dimensions: Make sure the trim or profile works with the field tile thickness and planned layout. -
Color and finish: Review coordinating pieces together when possible. Natural stone, glazed tile, and products with shade variation may not be identical from piece to piece. -
Linear footage: Measure every exposed edge and account for corners, cuts, and reasonable installation waste. Liner and border strips are usually sold by the piece in set lengths, so convert the measured run into a piece count. -
Installation sequence: Choose the edge treatment before tile setting begins. Many trim pieces and profiles cannot be added cleanly after the surrounding tile is installed.
Frequently Asked Questions
Can you finish a tile edge without bullnose?
Yes. Alternatives include jolly trim, a metal or PVC edge profile, a professionally mitered corner, or a tile with a factory-finished edge positioned at the termination. The best option depends on the tile, the location, and the desired look.
Is pencil liner the same as bullnose?
No. Bullnose is a field-tile-width piece with a rounded finished edge made to cap the end of an installation. A pencil liner is a much narrower decorative strip used mainly as a border or accent line, and only some profiles are intended to finish a terminating edge. Check the manufacturer's description of the piece before using a liner as the edge treatment.
Can caulk cover an exposed tile edge?
Caulk can finish an appropriate narrow transition joint, but it is not a durable cover for a broad raw tile edge and does not protect the edge from impact. If the unfinished tile body will remain visible, use a proper edge treatment.
Should grout or caulk be used where tile changes direction?
Changes of plane require a movement-accommodating joint rather than ordinary grout. Use a flexible sealant that is appropriate for the application and follow the installation specifications for the complete tile assembly.
Is a mitered edge better than bullnose?
Neither option is universally better. A miter creates a continuous tile-to-tile corner but requires more skill and labor. Bullnose is easier to plan and install when a compatible piece is available, and its rounded edge can be practical in frequently touched areas.
Can tile trim be added after the tile is installed?
Sometimes, but the available options are limited. Traditional bullnose needs open substrate beside the field tile, and many metal or PVC profiles are anchored beneath the tile. Retrofitting may require removing edge tiles or using a surface-applied product specifically designed for an existing installation. Planning the trim before installation usually produces the cleanest result.
Does tile trim have to match the field tile?
No. Matching trim creates a continuous look, while contrasting tile or metal can frame the installation. Whether matching or contrasting, confirm that the trim dimensions, thickness, edge shape, and application are compatible with the project.
Finish the Edge Before the Installation Starts
The cleanest tile edges are planned at the same time as the field tile. Decide where the tile will stop, identify every outside corner and recessed return, and confirm the required trim before ordering. This avoids last-minute substitutions and gives the installer the dimensions needed to build a balanced layout.