

A Comprehensive Guide to Zellige Tile: Design, Installation, and Maintenance Tips
Welcome to Tile Mart University! In this guide, we’re exploring the beauty, preparation, installation, and care of Zellige tile. Known for its handmade Moroccan charm, rich color variation, and imperfect surface texture, Zellige tile is a beautiful choice for kitchens, bathrooms, showers, backsplashes, and feature walls.
Love the Zellige Look?
Explore every color and finish in our full Zellige tile collection, from soft ivory to deep cobalt.
Shop Zellige Tile →What Is Zellige Tile?
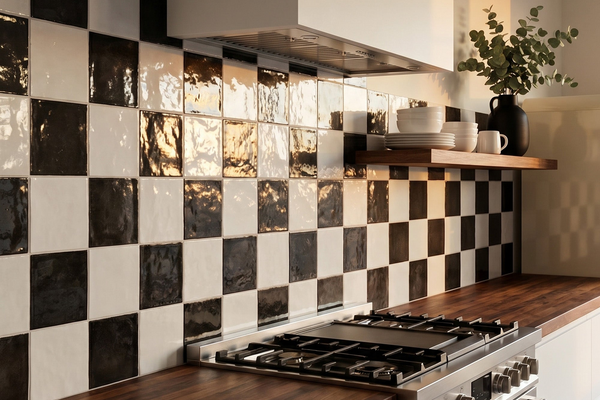
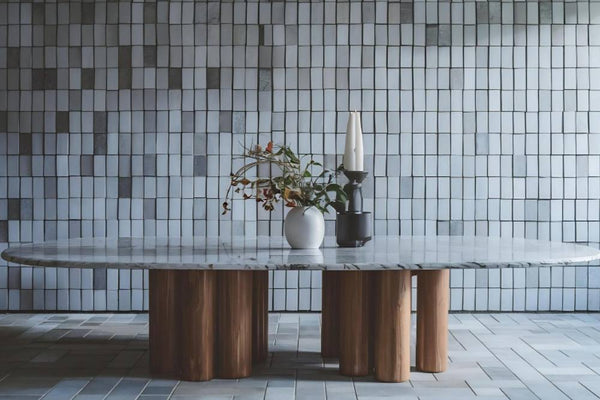
Zellige tile is a handcrafted tile traditionally made from clay and finished with a glossy, textured surface. Each piece has its own slight variation in color, thickness, shape, and edge detail. These natural imperfections are what make Zellige so special.
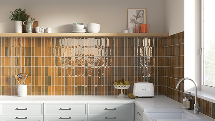
Unlike machine-made tiles, Zellige creates movement and depth once installed. The surface reflects light beautifully, making it a popular choice for kitchen tiles, bathroom tiles, shower walls, fireplace surrounds, and statement backsplashes.

Why Homeowners Love Zellige Tile
- Handmade character: Every tile has a unique look.
- Beautiful color variation: Creates depth and visual interest.
- Glossy reflective finish: Helps brighten kitchens and bathrooms.
- Timeless appeal: Works well in modern, rustic, Mediterranean, and traditional spaces.
- Designer look: Adds a custom, high-end feel to your project.

Best Places to Use Zellige Tile
Zellige tile works especially well in spaces where you want texture, shine, and personality. It is commonly used for backsplash tiles, shower walls, vanity walls, accent niches, and decorative feature walls.
| Area | Why It Works |
|---|---|
| Kitchen Backsplash | Adds shine, color, and handmade texture behind counters and ranges. |
| Bathroom Wall | Creates a spa-like, artisan-inspired look. |
| Shower Wall | Beautiful for feature walls when installed and sealed correctly. |
| Fireplace Surround | Adds texture and visual warmth to living spaces. |
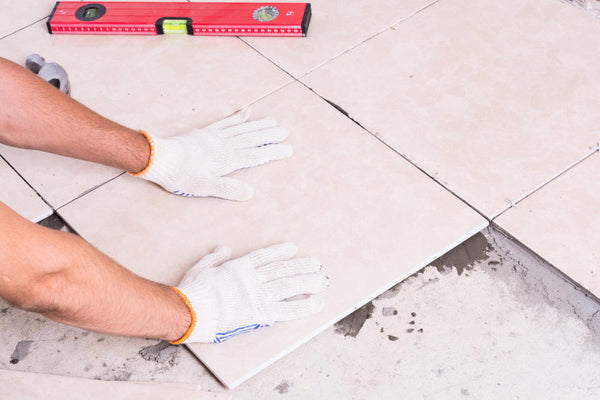
Preparing for Zellige Tile Installation
Because Zellige tile is handmade, installation requires more planning than standard ceramic or porcelain tile. Before you begin, make sure the surface is clean, level, and properly prepared.
- Prepare the surface: The wall should be clean, flat, dry, and properly waterproofed in wet areas.
- Blend tiles before installing: Mix tiles from several boxes to balance color variation.
- Order extra tile: Plan for 15–20% overage due to cuts, layout adjustments, and natural variation.
- Soak glazed Zellige when needed: Lightly soaking glazed tiles before installation may help remove dust and support adhesion.
How to Install Zellige Tile
Zellige installation is best handled by an experienced tile installer, especially for showers, corners, niches, and larger walls. These tiles vary in thickness and shape, so careful placement is important.
- Apply thin-set adhesive: Use the correct adhesive for your surface and tile type.
- Back-butter each tile: Applying thin-set to the back of the tile improves coverage and bonding.
- Place tiles carefully: Adjust each piece by hand to account for natural variation.
- Use tight joints: Many Zellige installations use very small grout joints for a traditional look.
- Grout after curing: Once the adhesive has cured, use non-sanded grout to help protect the tile surface.
Design Tips for a Beautiful Zellige Tile Project
- Mix before installing: Lay out your tiles first to blend tones evenly.
- Use lighting to your advantage: Zellige reflects light beautifully, especially in kitchens and bathrooms.
- Keep the layout simple: Let the handmade texture be the star.
- Pair with neutral finishes: Stone countertops, wood cabinets, and simple hardware work beautifully with Zellige.
- Order samples first: Color and texture can look different in your own lighting.

Zellige Tile Maintenance Tips
Zellige tile is easy to enjoy, but it does need proper care. After installation, seal the tile as recommended, especially in wet or splash-prone areas. For routine cleaning, use a gentle, non-abrasive cleaner and avoid harsh chemicals that may affect the finish.
- Seal after installation when required.
- Clean with mild, tile-safe products.
- Avoid abrasive scrubbers.
- Re-seal periodically in high-moisture areas.
Frequently Asked Questions
Is Zellige tile good for kitchen backsplashes?
Yes. Zellige tile is an excellent choice for kitchen backsplashes because it adds shine, texture, and handmade character.
Can Zellige tile be used in showers?
Yes, but it must be installed correctly with proper waterproofing, grout, and sealing.
Does Zellige tile need to be sealed?
In many cases, yes. Sealing helps protect the surface, especially in kitchens, bathrooms, and showers.
Why does Zellige tile look uneven?
Zellige tile is handmade, so variation in shape, thickness, edges, and color is normal. That variation is part of its beauty.
Should I hire a professional installer for Zellige tile?
Yes. Because Zellige varies from piece to piece, a skilled installer can help achieve the best finished look.
Ready to Design With Zellige Tile?
Zellige tile is a stunning choice if you want your space to feel handcrafted, timeless, and full of character. Whether you are designing a kitchen backsplash, bathroom wall, shower, or statement feature, Tile Mart has beautiful options to help bring your vision to life.
Ready to transform your space with Zellige tile? Visit Tile Mart for all your tile and stone needs. Whether you're planning a new renovation project or simply looking for inspiration, we have everything you need to bring your vision to life.
Love the Zellige Look?
Explore every color and finish in our full Zellige tile collection, from soft ivory to deep cobalt.
Shop Zellige Tile →


