


Subway Tile Installation: A Beginner’s Guide

If you're drawn to clean lines, timeless design, and transformative results, few projects deliver the same level of satisfaction as a subway tile installation. Whether you're remodeling your kitchen, upgrading a bathroom, or freshening up a laundry room, subway tile is a go-to material that offers style, durability, and accessibility for DIYers. What may seem like an advanced renovation is actually quite beginner-friendly with the right preparation, patience, and tools.
In this guide, we cover everything you need to know, including subway tile installation techniques, tile layout tips, grouting guidance, and a breakdown of the costs associated with installing a subway tile backsplash. By the end, you'll feel equipped and empowered to tackle this rewarding home upgrade on your own.

Why Subway Tile?
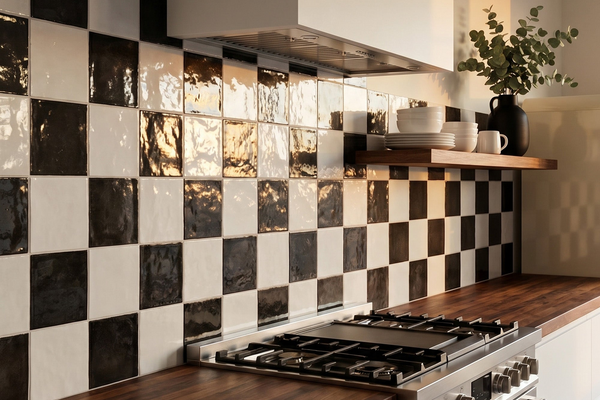
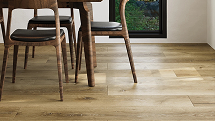
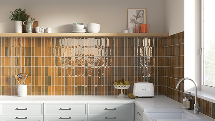
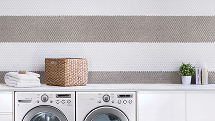
Subway tile has endured in design circles for well over a century, thanks to its simple rectangular shape and its remarkable versatility. It adapts seamlessly to a wide range of aesthetics, from modern minimalism to cozy cottages, sleek industrial to warm farmhouses. It’s often chosen for kitchen backsplashes, shower surrounds, bathroom walls, and laundry room accents.
Aside from style, subway tile offers practical advantages. Its smooth surface is easy to clean, resistant to moisture and staining, and widely available in various materials, including ceramic, porcelain, glass, marble, and even metal. With so many finishes, sizes, and colors to choose from, there’s a subway tile to suit nearly any vision.
And because of its standardized shape and size, installation can be more straightforward than other decorative tiles, making it a great entry point for first-time tilers.
Planning the Project: What to Know Before You Begin
Subway tile installation success starts with thorough planning. Consider the dimensions of your backsplash or wall and calculate the amount of tile you'll need. Always order a little extra, about 10% more, to account for breakage, errors, or last-minute layout adjustments. If you're installing tile around outlets, windows, or unusual angles, you'll want to ensure you have enough for precise cuts.
Before making any purchases, it's essential to consider both the aesthetic and technical elements. Will you opt for a classic brick layout or a more contemporary design, such as a vertical stack or a herringbone pattern? What grout color will best contrast with or blend into your tile? Will you finish the edges with trim or leave them raw for a minimalist look?
Another factor to consider is your substrate, the surface onto which you'll be tiling. For kitchen backsplashes, clean and sanded drywall may suffice. In areas exposed to water, such as showers, you’ll need a cement board or a waterproof membrane as your base.
And of course, consider your budget. While subway tile itself is usually affordable, the cost of installing a subway tile backsplash can vary depending on the materials chosen, the size of the area, and whether a contractor is hired or the DIY route is taken. Doing it yourself can significantly cut costs, but it’s essential to invest in quality materials and tools to avoid costly repairs later.
Gathering Tools and Materials
Once your plan is in place, it’s time to gather all the necessary items for installation. Typical tools for a subway tile installation include a notched trowel, tile cutter or wet saw, tile spacers, level, measuring tape, pencil, sponge, mixing bucket, and a rubber grout float. Don’t forget safety goggles and gloves for protection.
Your materials list will include subway tiles, tile adhesive or thinset mortar, grout, grout sealer, and possibly tile trim pieces for finishing edges. For kitchen backsplashes, pre-mixed mastic is a convenient adhesive option, while thinset is better suited for wet or high-heat areas.
Ensure that everything is easily accessible and well-organized before you start. A smooth start sets the tone for the entire project and helps prevent costly mistakes.
Prepping the Surface
Proper surface prep is crucial for ensuring that your tiles adhere well and stay in place long-term. Begin by turning off the power to any outlets or switches in the tiling area and removing outlet covers. Clean the wall thoroughly to remove grease, dust, or residues. If you're tiling over drywall, lightly sanding the surface can improve adhesion.
Use a level and a pencil to draw a guideline along the wall where the first row of tiles will go. This helps ensure a straight, consistent line even if your countertop or base isn’t perfectly level. If your surface is significantly uneven or textured, you may need to apply a skim coat or install a backer board for a flat, workable base.
Laying the First Tiles
With your layout planned and your surface prepped, you can begin applying adhesive. Use a notched trowel to spread a thin, even layer over a small section of the wall. Hold the trowel at a 45-degree angle to create uniform ridges, which help the tile bond securely to the surface.
Press your first tile into place using gentle pressure and a slight twisting motion. Insert spacers between each tile to maintain consistent spacing for grout lines. Continue working in small sections, keeping a close eye on your level to ensure everything stays aligned. Use tile spacers and adjust tiles as necessary before the adhesive begins to set.
For tiles that require cutting around outlets or corners, for example, a tile cutter works well for straight lines, while a wet saw or tile nippers are better suited for more complex cuts. Remember to measure twice before making cuts to avoid wasting tile.
Take your time during this stage. Precision here results in a clean, professional finish later.
Letting the Adhesive Set
Once your tiles are in place, resist the urge to move on to grouting right away. The adhesive requires 24 hours to cure, although the exact curing time may vary depending on the product and environmental conditions. Avoid touching or cleaning the tiles during this time to ensure they bond properly.
This pause in the process is an ideal opportunity to clean up tools, plan your grout lines, and review any touch-ups or additional tile cuts required to complete the installation.
Grouting the Subway Tile
After the adhesive has cured, remove the tile spacers and prepare your grout. Whether you’re using sanded or unsanded grout will depend on your tile spacing; most subway tile installations use narrow joints, which pair best with unsanded grout.
Use a rubber grout float to press the grout into the spaces between tiles, holding the float at a 45-degree angle. Work diagonally across the tiles to avoid pulling grout back out of the joints. Once all lines are filled, use a damp sponge to gently wipe away excess grout from the surface of the tiles, being careful not to pull grout from the seams.
You’ll need to make several passes with a clean sponge, rinsing frequently, to fully clean the tile face. Once the grout begins to haze over, use a dry cloth to buff the tiles and restore their shine.
Allow the grout to cure according to the manufacturer’s instructions (usually about 48 to 72 hours) before applying a grout sealer. This step is especially important in kitchens and bathrooms where water and spills are frequent.

Finishing Touches
With your tiles and grout in place, it’s time to finalize the details. Reinstall outlet covers, caulk any gaps between the backsplash and countertops, and wipe down the entire area to remove any remaining dust or haze. If you used trim pieces, make sure they’re secured and sealed properly.
These finishing steps bring polish and cohesion to the project, turning a tiled wall into a design feature.
Troubleshooting Common DIY Issues
Every tiling project presents its own set of challenges, and common mistakes are often made by beginners. Tiles slipping out of alignment usually indicate either too much adhesive or not allowing the lower rows to set before tiling upward. Lippage (uneven tile heights) often results from inconsistent adhesive application or lack of a level surface.
Grout cracking or shrinking can happen if the mix is too dry or if the grout wasn’t pushed deeply enough into the joints. Fortunately, many of these issues are preventable with careful planning and a willingness to work slowly and methodically.
Don’t be discouraged if the process isn’t perfect the first time around. Tiling is a skill that improves with experience, and even small imperfections can add to the character of a hand-crafted installation.
Understanding the Cost
When budgeting for your subway tile backsplash installation, costs can vary widely depending on the materials and whether you hire a professional or do it yourself. For DIY projects, subway tile typically ranges from $5 to $15 per square foot, depending on the type of material used. Add in grout, adhesive, sealer, tools, and a 10% tile overage, and you’re looking at a total between $100 and $300 for a standard kitchen backsplash.
Hiring a professional tile installer incurs additional labor costs, which can increase your total to anywhere from $600 to $1,200, depending on the job's complexity. Custom layouts, high-end tile materials, or full-wall installations can increase costs.
By doing it yourself, you not only save money but also gain a deep appreciation for the craftsmanship that goes into tiled spaces. You also retain full control over design choices, pacing, and final appearance.
Is Subway Tile Installation Right for You?
Taking on a subway tile project requires patience, preparation, and a steady hand, but it’s entirely achievable for first-time DIYers. If you enjoy working with your hands, planning details, and seeing tangible progress, this type of renovation can be incredibly fulfilling. The key is to respect the process, follow instructions closely, and avoid rushing. Your reward is a crisp, stylish, and long-lasting wall feature you created yourself.
There’s also creative satisfaction in choosing your tile color, pattern, and layout. Whether you stick with the classic white brick style or venture into herringbone or stacked designs, your backsplash becomes a reflection of your aesthetic. The possibilities are vast, but the process remains grounded in simple, repeatable techniques.

Your Tile Journey Starts with Tile Mart
At Tile Mart, we understand that starting a home improvement project, especially one like installing subway tile, can feel intimidating. That’s why we offer not only premium-quality tile but also the support and guidance to help you succeed. From selecting the right product to understanding layout and installation techniques, we’re here to bring your vision to life.
With fast delivery, top brands, and a customer-first approach, we’re proud to support both first-time DIYers and seasoned pros. Whether you're exploring the cost of subway tile backsplash installation or looking for step-by-step advice on how to install subway tile, we’ve got everything you need to get started and feel confident in your project.
Visit us online to explore our full collection and see how easy it is to bring your tiling dreams to life with Tile Mart. Let’s tile something beautiful together!